LET'S MEET ONLINE

LET'S MEET ONLINE! Call (512)560-2609 or email helpimnotageek@gmail.com and set up a time for a session. It works really well. We talk on the phone while I see your screen.
Showing posts with label images. Show all posts

Tuesday, February 11, 2014

Snapchat and Instagram


The saying is that a picture is worth a thousand words. It must be true if you think about how popular pictures are on computers and mobile devices. Today I am going to talk about two apps for download to your iPhone, Android or Windows Phone. In some ways they compare to Twitter because in a very short time you can communicate to all of your followers. The main difference is that these apps both use pictures instead of text as their way of communication.


INSTAGRAM

Instagram has been around since 2010. In April of 2012 it was aquired by Facebook. Instagram is an instant photosharing app. When you open the app you can take pictures and instantly send them to one person OR to all of the people who follow you. You can set your profile to private so that only people you approve can follow you, or you can leave it open and anyone can follow you and see whatever photos you send out.


PROs

  • You can send photos you take immediately out to a bunch of friends at one time. So it is an easy way of sharing with friends or family.
  • A copy of each photo you have taken is kept in your profile, so you can go back and see what you took in the past.
  • You can delete pictures that you took in the past. At the bottom of each picture there are three dots ... When you click them a menu opens up that gives you the choice to delete, share the photo, copy and share the URL, email the photo and tag people who are in it. Each photo that is uploaded is kept on the Instagram server and can be accessed that way.


CONs

  • The photos you take and send are out of your control once someone else receives them. They have the ability of sharing it with someone else and even to put it onto their Facebook.
  • These pictures are not easy to print or even to save to your computer.


Why would people want to use this?

Receiving photos exactly when people have taken them is exciting and makes you feel more a part of their life. Teenagers like to send funny photos to their friends to make them laugh. It is also possible to edit the photo and write captions on it before sending it. (the picture at the top was taken when I was looking at a webpage on what age people should stop driving. I typed the words across it!)

SNAPCHAT

The guys who created SNAPCHAT were feeling frustrated by the privacy issues with Facebook and Instagram. The problem of photos being resent to others and downloaded and saved could cause a person problems. Even if you delete your account you never know if someone downloaded and saved one of your pictures and it will show up when you least expect it. These Stanford students (age 22 and 24) created an app very similar to Instagram, except that the pictures are only available for 10 seconds when the person who received them opens them up. The picture then vanishes and is removed from the server.  It is possible, but difficult to copy a picture that shows up for just 10 seconds.


PROs

  • A person can send a funny picture without worrying that it will be around forever. 

CONs

  • People can use it to send inappropriate photos (nude, etc...) that will not get them in trouble.


Why would people want to use this?

Like Instagram it is possible to send things immediately to friends or family when something is happening. You can send funny pictures that make you laugh without worrying that they might show up later and not be so funny.  


Tuesday, August 28, 2012

Creating a Collage in Adobe Photoshop Elements

CREATING A COLLAGE
USING ADOBE PHOTOSHOP ELEMENTS


1. Search for images: Go to http://images.google.com/hosted/life  to get images from the Life Magazine Collection that Google has digitized.

2. Now create a folder on your desktop and save the photos that you want to use for your collage.
  • Go to desktop of your computer.
  • Right click and choose NEW-FOLDER
  • Name your folder PHOTOS
  • Go to the link above.
  • Select 5 interesting photos or more
  • As you find them right click on each one
  • Choose SAVE AS and put them into your folder on the desktop.

3. Import those pictures into Photoshop Elements.
  • Open Adobe Photoshop Elements
  • Choose EDIT
  • After the window opens up choose FILE>NEW>BLANK FILE
  • Name your new file by typing in a new name at the top of the window that comes up.
  • Pull down where it says “preset” and choose “Photo” for size choose 8” by10” and resolution 300. Then Click OK.
  • You should see a large white space that we are going to use as the background.
  • Open the pictures you saved by choosing FILE>Open and finding the pictures you want to use. Highlight them and choose Open. You should see them open along the bottom of the screen. If you don’t see them go to the menu at the top called Windows and make sure there is a checkmark near Project Bin.
Creating your Collage

Put pictures onto the background that you created by dragging them up from the bottom of the screen.

Each time you add a picture a new layer is created. You can edit and move around each picture without changing any of the other layers.

 If you do something to a layer that you do not like look to the far right side of the Layers Window and click on the down arrow.  This menu will allow you to delete the layer. Start over by adding the picture back in with either FILE>OPEN and finding the picture or dragging and dropping the picture from the Project Bin again.

Use the tools to edit each of the pictures to make them look the way that you want them to for the collage. You can resize them, rotate them, crop them, or choose from the many special effects. See the next page for a summary of the tools.

When you are happy with the results you need to FLATTEN your picture which will paste all of the layers together making ONE picture and then save it.


Tools

You can use these tools to edit your photos. Any of them that have a small triangle at the corner have several options. Hold the mouse button down on them and wait until all of the choices appear.
Move Tool-You must have this to move the image or rotate it.
Hand Tool

Square select tool-hold the mouse on it to see it become the Elliptical Select Tool
Magic Wand Tool-Click on a part of the picture to select all of the part that is the same color.
Text Tool-Use this tool to create text on the picture,
Cookie Cutter Tool-This tool cuts out a piece of the picture in the shape that you choose.
Red Eye Tool-Automatically removes red eye from photos.
Clone Stamp Tool or Pattern Stamp Tool-This tool is very useful for editing a picture
Brush Tool-Several Brushes to choose from.
Paint Bucket Tool-Spills colors defined in boxes at the bottom.
Rectangle Tool-Has many other shape options.
Sponge, Dodge and Burn Tool
Foreground and Background Colors-Click on the box to change hem click on the arrow to switch between foreground and background.
Magnifying Glass-Option click on Mac or Rt click on PC to minimize.
Eye dropper tool-Use this to select on color from an existing photo. It becomes the foreground color
Lasso Tool-select a unique shape. Also has a Magnetic Selection Tool.
Quick Selection Tool-Try it!  You’ll like it!
Recompose Tool-Does amazing recomposing of pictures automatically!
Straighten Tool

Healing Brush Tool

Eraser-Hold down your mouse to see the special erasers. Try the Magic Eraser!

Smart Brush Tool

Gradient Tool

Blur, Sharpen, Smudge Tool

Adobe TV
There are video tutorials on these tools showing what they can do and how to use them. http://tv.adobe.com/show/learn-photoshop-elements-10/

Creative Commons
http://creativecommons.org/ You should always cite where you get your images from and be aware of the copyright. Creative Commons is a way to show that work can be shared in different ways. Everything you create is automatically copyrighted. People are not supposed to use your work without your permission. You can give your photos a Creative Commons License.

Friday, August 17, 2012

Searching With Images

I just learned something new and really interesting. You can search Google using images instead of words! 

You just go to Google.com and choose IMAGES from the top of the screen. The Google Images search shows up (like the one above). 

Click on the little camera in the window where you would usually type in a search term. 

Then find the image you want to use and drag and drop it into the spot that Google opens up for you.


The results are interesting. I found that Google matches the color of the image and finds other images that have a similar color palate.

Here is the image I used.


And here is the result:


Try it out! It is fun!

Thursday, June 21, 2012

Images as Answers to a Google Form

I have not been writing for a while. I took a job as a long-term substitute for the technology teacher at University of Texas Elementary and life just got too busy.
Picture of UT Elementary Website


If you want to look at the Digital Stories the kids created click on the image above.

I got a question at helpimnotageek@gmail.com about creating a Google Form that allows people answering the form to include images. I decided that should be my first post as I return from my "sabbatical".

First, you may know this already, but here is what I do when a question like this comes up. I go to my search box and type in what I am wanting to know. In this case I used a Google search for "including images in Google Forms". I found lots of information on how to include an image into the form you are making, but none on creating a form that can receive pictures. Here is what I sent to the person that requested help:


"I could not find a way to do this.  You can add an image to your own Spreadsheet and I found lots of ways to change the code of a form so that it allows you to put in images. Teachers want this a lot when they are creating tests. There were suggestions that this be changed in the future in the discussion forum, but it sounded like it is not available now.

The discussion forum about Google Docs that is also a place to suggest ideas. It is possible your answer is here somewhere or you could suggest your idea.


http://productforums.google.com/forum/#!forum/docs

The discussion forum was interesting and searchable! It seems like a good place to go to find things out about all of Google's programs.

picture of discussion groups on Google Forum
It is good to be back. Feel free to add your own knowledge to the comments or to email me any questions you have. Remember that I am available for one on one or group tutoring in Austin, TX.

Wednesday, October 12, 2011

Addition to Printing Address Labels

The recent post about printing address labels was from Eileen. She came to me and said that my response was nice, but I didn't understand what she wanted. She wanted to print a DIFFERENT picture next to each address.

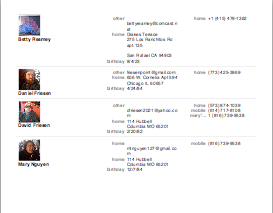
Well, I am not sure if the following information is helpful or not. With the Mac Address Book you can assign an image to each of your contacts. I usually try to take pictures of people that I add into my address book so I have both their picture and their information. You could just as easily put pictures of different flowers or anything you want for each person. The address book will allow you to print a LIST (not labels) which has those pictures showing right next to their phone numbers. For this list each person has their own picture.

When you set it up you have a choice of what information to display. My computer started by just showing the phone numbers, but I was able to add the address, email, and birthdays. There are a lot of other choices. You can see an example on the side. These pictures are tied to the information and so if you delete one of your contacts the image is also deleted. See the link above for more detailed information about creating this. The main thing to remember is the word PRINT! You have to choose that before you can set anything up.

Thursday, September 8, 2011

Saving your Photos from Fire Two-Picasa

Picture downloaded from Picasa from Jeremy King
Yesterday we talked about Flickr as one place that you can upload your pictures. Having all your precious photos online somewhere means that they will not be damaged if there is an earthquake, flood or a fire. Today I will talk a little about Picasa.

Picasa works a little differently than Flickr. It actually has two parts. One is a program on your computer and the other is online file space.

You start with Picasa by going to http://picasa.google.com and downloading a copy of the free program. It puts a program on your computer that can automatically look for all of the pictures on your computer and display them into the one program. It does not actually move any of the pictures, but puts a pointer to them so that you can find them all in one place. So far all you have is a program that helps you organize what is already on your computer.

The thing I find most irritating thing about Picasa is that it automatically goes and finds all of your pictures, so when you open it up you see a scrolling window on the bottom left side that automatically finds and categorizes all of the graphics on your computer. You can set it up to only look in certain folders for pictures.

First go to Tools>Folder Manager
In the Folder Manager you can indicate which folders you want Picasa to look for new pictures. Now when you open the program it will only collect and display the new photos you wanted it to find.

Picasa always leaves the original of your photos the same as it was. It is a program for organizing and editing your photos. When you open a picture and do some editing of it the original is not changed and when you save it a second copy is saved so that the original stays the same.

The next thing that you can do with Picasa is to upload your pictures to a web album. This web album works like Flickr. You can choose to upload the pictures you want there and you can make them public or private. The photos that you have not uploaded yourself are NOT on the web and will be destroyed or lost if your computer is damaged.

In order to upload any pictures that you want to save find the picture or folder from the left side menu and at the top of the window that appears choose SHARE. You will be given a choice to share these pictures publicly or privately.


When you have uploaded them you will find them at http://picasaweb.google.com. From here you can either search everyone's public photos with the search at the top of the page or log into your own album. Your online web album also has privacy settings. Here you can allow people to see your images, but not download them or even keep them completely private so that only you can see them when you log in.

Picasa recommends that you make a back up copy of all of your pictures using TOOLS>BACK UP PICTURES in order to be sure that you are actually saving all of the originals. The program automatically resizes the photos when you upload them so that they do not take up too much space. You can set it up so that your original sizes are uploaded, but it will take a lot of room and you may use up space quickly. If you lose your external hard drive in a fire you will be happy to at least have the smaller versions saved.

Because Picasa is a Google program it has a connection to Blogger and so any images that are posted to a blog are also posted in Picasa online. All of the images from this blog can be found in the Picasa album from this blog.

There is some fantastic information here that goes more in depth. https://sites.google.com/site/picasaresources/faq

There is so much more that you can do with either Picasa or Flickr, but this should give you a start saving your precious photos. Picasa is made for editing, organizing, sharing and creating things with your photos.


Tuesday, August 30, 2011

Embed Code

On Flickr, YouTube and many other sites you get the choice to use "embed code" in order to put any media (picture, video or audio) on Facebook or another website. Here are the steps for using the embed code:
Go to the site that has the picture or video you want to use. To find the embed code choose SHARE. You will be given a choice to post to various places or get the link to copy and an embed code (on Flickr it was called HTML or BBedit code). Copy the embed code.  


    Go back to the page you want the media to be on. To go back to the place that you want the picture to show up, choose EDIT HTML or whatever you need to do in order to edit the code. You can guess where you think the picture should go by looking at the code on the page. It includes the words that are on the page, so if you do a search (CTRL-F or F3 on a Mac) for those words you can paste the code directly into the HTML. Here is an example: (I searched for the words "Here is an Example:)

    Hephaistos Temple
    When I pasted the code into the HTML on my blog this is what actually showed up!
    Now you can save, publish or preview to see that the picture or video that you wanted to show is now on your webpage.

    The reason to use embed code is that the picture STAYS on the site where it was originally and you just put in a pointer to that place. When someone looks at your page the computer automatically gets the picture or video from the other place and puts it on your page.

    Tomorrow we are back to Facebook!

    Thursday, July 28, 2011

    Putting a Caption on a Picture in Picasa

    Picasa is a free program owned by Google that will organize and store all of your photos and images. You can download it at http://picasa.google.com/. The program will allow you to edit your photos and even put captions on them.

    When the program opens it looks all over your computer to find the photos on your computer. It then puts copies of them  into the program (It does not move them from where they are found) and organizes them by date and name of the folder that they are found in. It can be disconcerting to open Picasa and see that immediately it begins going through all of your files. It is reassuring to know that they are not being moved from where you saved them, just cataloged and organized how Picasa thinks that they should be.

    Like many photo programs now Picasa tries to protect the original photo that it finds. It does this by forcing you to create a copy each time you change the photo. If you resize a photo it will still keep an original the larger size. However, when you put a caption onto your image the caption does not change the image, but adds information to the code that is in the background of your image. For this reason when you save that image or burn it to a CD it will seem that the caption is gone. It is not gone. It is just hiding in the background. To see the caption after it is saved you need to get the properties of the image.

    On my computer when I click on an image file it opens up with the program called "Preview". Under the Tools Menu is something called the Inspector that I can hide or show by clicking on it. When I clicked on Show Inspector a window opened up that said INFO and had an i in a circle as one of the choices. When I clicked it there were 4 choices and under the one called IPTC I found the caption! It still did not show on the picture, but it was there hidden in the code.

    If you want your caption to show on the final image you need to copy it and then paste it directly onto the picture. Then when you burn it to a CD or Export it somewhere on your hard drive the caption will stay on the picture.

    Another way is to add words directly onto a photo. There is a button under the words "basic fixes" that has ABC written on it and says 'text' underneath. When you click on this button you can use it to type something right onto your picture. You can change the color or font of the letters and drag and drop it to where you want it to show up.

    Final Photo with Text Edit
    I was able to go back to Picasa, select that picture and choose PICTURE from the top menu and Undo All Edits from the list below. I kept the picture with the edits in my folder where I had saved it, but Picasa still has the original, so if someday I want to edit it a different way I can.

    Wednesday, July 20, 2011

    Working with Images Online

    When I added this (741 KB) picture Blogger automatically resized it so that it would fit the screen.

    This is the same image that I resized myself to 8 KB
    For the longest time I was so frustrated when I saw a picture online that I liked and then printed it and the picture printed out tiny OR someone sent me a picture and it would not fit on my screen because it was so huge.
    This is because the pictures that you see on the screen are digital representations of the pictures that people have put onto their webpages or emailed to you. Pictures are measured in DPI or dots per inch. In order to make digital pictures small so that they download quickly people often compress their photos. The computer takes out some of the dots in a way that the picture still looks good on screen! This can effect the resolution of the picture (or the quality) so that you cannot drag the picture to a larger size. When you try it becomes little color squares..

    Most (all?) digital screens only show up to 72 DPI (or dots per inch). If the picture you are seeing has high resolution (more than 72 DPI) sometimes the picture will look HUGE on your screen. One confusing thing is that many programs (like word) allow you to click on the image and drag the corner to make it smaller.  When you do this you are only changing the LOOK of the picture, not the DPI, so even though it looks small it will take a LONG time to download and when someone tries to print the picture it will come out huge.

    You cannot make a picture with a low number of dots per inch bigger. It will not look good. Artists (and lots of other people) save both a high quality, high resolution picture and the smaller one that they can use to send to people or post online. 

    I hope that this is a helpful explanation of images online. If you have questions please post them in the comments. Tomorrow's post will be about FILE SIZES.