LET'S MEET ONLINE

LET'S MEET ONLINE! Call (512)560-2609 or email helpimnotageek@gmail.com and set up a time for a session. It works really well. We talk on the phone while I see your screen.

Tuesday, April 30, 2013

Dewitty Computer Center

Last week I attended a day out of a two day forum on the Digital Divide which took place at the LBJ school. People were there from lots of different states and I learned a great deal. One of the main things I learned about is the:  

DEWITTY JOB TRAINING AND EMPLOYMENT CENTER 


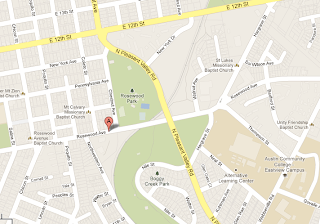
Map of the Dewitty Center AustinIt is located on Rosewood Dr. here in Austin, Texas.  One of the services that they offer is a free computer lab staffed by people who will help you with what you need to do. It is called Austin FreeNet. Since it is part of the Dewitty Job Training and Employment Center there are many people there who need help with Resumes and Filling out Forms. They said that in April there are lots of people working on filing their taxes online. It is free for people to use the lab and they help you with whatever you need.

Austin FreeNet  http://www.austinfree.net/ This page has a good summary of the meeting that I attended. They run computer labs and training in lots of different locations. See this page for a list of their locations. 

If you need to learn technology you will want to check this place out!


Tuesday, April 23, 2013

Do you Tweet? Some ideas on Twitter

Twitter is everywhere. 

Recently....

  • when I watch TV, especially the news shows, I am being invited to follow someone. 
  • I can follow my favorite grocery store or clothing store. 
  • When the bomb first went off in Boston a person who was there first thought of checking Twitter to see what happened. When there was nothing yet he sent out a tweet to his followers.
Twitter is a way to send a short message to a group of people who follow you. It is great for stores because they can send out one short message to let all of their loyal customers know something like what will be on sale soon. It is a way to connect to other people who are interested in the same things that you are.

TIP #1 After you sign up the next thing to do is to find some people to follow. You can follow regular people who are also using Twitter, movie stars, newspapers and shows, and stores. There is a Search window at the top right side of the page. Type the name of the person, or organization that you want to follow in the search window. If they are on Twitter the program will find them and you can click on the  Follow button.

TIP #2 Often when you choose to follow someone they follow you back, but not always. President Obama has a Twitter account and you might want to follow it to see what he is up to.  Here is what his page says about who follows him and who he follows. You can actually click to see who these people are.

TIP #3 It is easy to stop following (unfollow) someone. There is no notification when you stop following someone, so you can be sure that no feelings are hurt. To stop following someone you just open the list of who you are following and click on the word Following next to their name. When you roll over the button it turns red and says "unfollow" and then if you click they stay on your list, but the button next to them says Follow. You can click it again to begin following them.

TIP #4 If you want to look at everything that one person has said on Twitter just search for them by typing their name in the search window. It will take you to their profile and then you will see ONLY what they have posted.  Try it out with my Twitter. My twitter name is @jfriesen. If you do this search you will find a note especially for Blog readers. Also if you see @jfriesen (or another name) on a tweet it means that the tweet was written especially for that person.

TIP #5 Hash tags # are used to create one word that everyone can agree upon so that when you search for that word you get all of the tweets about that topic. For example, yesterday was Earth Day, so there was a #earthday hash tag. If you search for that it will bring up all of the posts from everyone, not only your followers that have the #earthday in them. 

TIP #6 RT means Retweet. If you read something you really think is important on Twitter you may want to retweet it. That will send it out to all of your Twitter followers.  Retweeting helps get important news out.

TIP #7 DM means that you want to send the message directly to one person rather than to your whole list of followers.

This symbol indicates that you can follow this person or place. They want you to keep track of them and keep in touch with what they are doing.
There are lots of programs that allow you to see Twitter in different ways. It is worth looking at them to see if you like how any of them work. These are programs that download to your computer and connect with your Twitter feed so that it shows up in columns or in other ways that may make it easier to read or follow. There are many others than those listed below.


A STORY

When I was writing this I wanted to check on what was "trending" on Twitter. Trending is a measure of what is getting the most attention. Someone had hacked the Associated Presses Twitter and sent out a note that the White House had been Bombed and that President Obama was injured. It was not true, but it was retweeted quickly by many people so much that the stock market dropped. A few seconds later the Associated Press sent out a note about it being untrue and the market went back up. Look at this interesting graph!


The ease of using and following Twitter on a Smart Phone has made it very popular. With just a glance I can check to see if I have any new "tweets" and keep up to date on the people I am following. The other reason that Twitter has become so popular is that it is instant. At SXSW in Austin where it was first used people were using it to communicate to their followers where the cool things were and where to meet. You could easily tweet "Come to Antones to see Willy Nelson!  He just walked in!". Pretty cool. It is good for conferences where there are lots of people and places to be and you want to keep in communication in a quick way. 

Tuesday, April 16, 2013

Windows Tricks in Windows 8 and earlier versions of Windows

Windows Explorer is extremely helpful. It is allows you to see all of the things that are on your computer and work with them. This post will guide you through using Windows Explorer or File Explorer (in Windows 8) to set up your computer and to understand what is in it.

Getting to Windows Explorer


Earlier Versions of Windows
Right click on the "orb" or little colorful windows icon that is in the bottom left of the screen when you start up the computer. One of the choices that comes up is Windows Explorer.

Windows 8
To get to File Explorer which is the same as Windows Explorer first choose the Desktop from the Ribbon Menu. Then click on the file folders on the bottom left of the screen.

A Walk Through

When the window first opens on the left you see a list of all of the things that are in your computer. When your arrow is pointing to them you see little triangles next to each item. These triangles mean that there are sub folders inside each of the folders. When you click one of these triangles it will change the left side list by showing you what is in the folder, but it will not change the right side at all.

The right side shows what is inside whatever folder or item is select. Try clicking on different icons and you will see how the right side changes. 


Changing the Look

Sometimes it helps to have the programs and folders on your computer look a different way so that you can find them easily.  For example this is shows the same list of files as above in Detail View. This is nice because you can see the size of the file and when it was last edited. You do that by choosing the icon that shows the way that you want the files to look. The picture above is in Windows 8, but a very similar picture can be found in other Windows programs.

Folders Creating and Organizing

To create a new folder right click on the area where you want the new folder to show up. A window will appear. Look for the word NEW and put your mouse on it. Another window will open up that says Folder (or Library) and when you click on it a new folder will open up. You can change the name of the folder by typing in the name you would like it to have. 

You can think of a Library as the top level in a system of file folders. It is like the drawer of the file cabinet. Inside the library are folders that have files in them. Libraries can even have documents in them that are NOT in a folder. You decide how all of this is organized.

Windows comes with four Libaries to start with: Documents, Music, Pictures, and Videos. Inside each one of those are files and folders. When you save a file you can choose to save it anywhere that you want to, but this structure is supposed to make it easy to find your work. 

Let's say that two people are using the same computer. You may want to have a Folder for each person and then inside that folder create Documents, Music, Pictures, and Videos folders to keep the two accounts separate. There are other ways to do this that are beyond the scope of this post.

Moving and Deleting Files or Folders

I think that using Windows Explorer is the easiest way to move and organize my files.  
1. Get the left side arranged so that all of the folders needed are showing. 
2. Click on the folder that contains the file I want to move so that I can see it on the right side and drag it to the left side to move it where I want it to go. 
3. When the folder is highlighted let go of the file you are moving and it will drop into the folder.

Cut or Copy and Paste?

If you want to MOVE the file so that it is in the new place and there are not two files in different locations choose to CUT and PASTE the file.

If you want to have one copy of the file in the original location and create a second copy in another folder you can COPY and PASTE the file. 

If you press down the "ctrl" key when you are moving the file it will switch between "copy" and "cut".

Clicking Once or Twice

People I know and have worked with seem very concerned about when you click once and when you click twice. This has never bothered me. I click once and wait. If nothing happens I click twice. I guess that doing that for a while has made me intrinsically understand when to click once and when to click twice. I usually just do the right one, but programmers have made these rules. It could be that some people learn better by knowing the rules and applying them, so here they are:
1. To open any program on your desktop click twice.
2. To open any program listed at the bottom of your screen click once.

You can also change how many clicks or how quickly you must click by going to  mouse in the Control Panel and looking at what settings there are.

Right and Left Click

Almost everything is a Left Click. The left click should be your default. Right Clicks do EXTRA things and are very helpful. Usually they bring up a list of choices of things that you can do for the item you are clicking on. For example if you right click on the desktop you can create a folder, change the background picture, personalize your computer, sort the folders on the desktop, etc...

This post was inspired by a class on Windows at the Austin Groups for the Elderly Computer Center in Austin Texas. It is a great place to come for low cost computer classes.http://www.ageofcentraltx.org/computer_lab.php


Monday, April 8, 2013

Taking a Screen Shot with various Devices


Mac
You can take screen shots with keystrokes or with a program on the computer called GRAB.   Grab always gives you a chance to save your screenshot as a .tiff with whatever name you want.  The keystrokes automatically name them Screenshot with the date and time it was done. They are saved as .jpg

  • Command-Shift-3: Take a screenshot of the screen, and save it as a file on the desktop
  • Command-Shift-4, then select an area: Take a screenshot of an area and save it as a file on the desktop
  • Command-Shift-4, then space, then click a window: Take a screenshot of a window and save it as a file on the desktop


  • Command-Control-Shift-3: Take a screenshot of the screen, and save it to the clipboard
  • Command-Control-Shift-4, then select an area: Take a screenshot of an area and save it to the clipboard
  • Command-Control-Shift-4, then space, then click a window: Take a screenshot of a window and save it to the clipboard
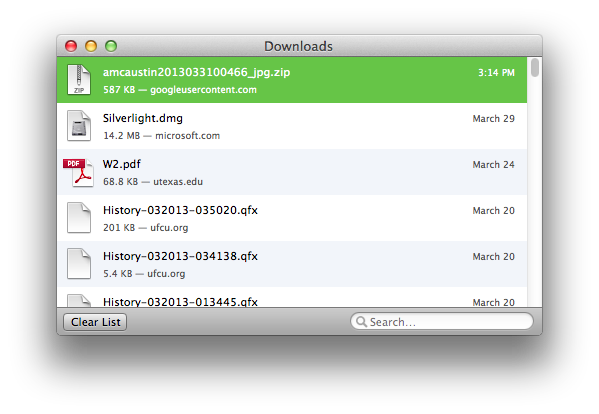
Grab is a very basic free software on Mac that does exactly what the keystrokes above do. The main differences is that when you use the keystrokes your screenshot is saved automatically as a .jpg on your desktop and named Screen Shot with the date and time. If you use Grab the screenshot opens as a .tiff and you can save it in with a name and location of your own choosing. If you want either one to be in another format you have to open them in a different program like Preview and save them again in the new format.

Some of this article is copied from MacRumors http://guides.macrumors.com/Taking_Screenshots_in_Mac_OS_X
  This Wiki is a guide for Macs and other devices. A wiki is a shared webpage and members add the content.


PC
The Snipping tool can be found under Accessories in Windows 7 and many other Windows Operating systems. Snipping a screen or window allows you to save it with your own choice of name and location.

Another way to do a screen shot that is built in is to use the Print Screen button. It will take a screenshot of the whole screen. Alt-Print Screen takes a screenshot of the window that you click on rather than the whole desktop.

These methods both create a picture that is on your clipboard. If you want to use the picture on a document you can just paste it onto the document (Edit-Paste)

If you wanted it to be a picture file and to use it somewhere else or email it you need to open a different image program.  Paint is a free program on your PC. Open the program and then paste the picture on your clipboard onto the blank picture space that you see. You can then save it.


iPad and iPhone
Both the iPad and the iPhone will take screenshots when you press the home key and the on/off switch at the same time.  The screenshot goes into the Gallery and you can download it to your computer the same way you do any other picture.


Surface with Windows 8
To take a screenshot hold down the windows key at the bottom of the keyboard while hitting the down volume button on the side. The picture will go into a folder in the Picture Library called Screenshots. The files are .png files and you can email them as attachments to get them onto your computer from the Surface or use them directly on the Surface to insert into a document.

The Surface also has a tool program called the Snipping Tool. It will allow you to take a screenshot of a window, a rectangular selection or a freeform selection.

Android
A screenshot with any device running the Android system (most Smartphones that are not iPhones) can be done by pressing the volume down and the power keys at the same time. You must have a SD Card in your phone to take and store pictures.

Downloads

All of the methods above come with the device that you are using. If you want better quality screenshots or if you want screen video that shows what you are doing the following are free or low cost programs that you can download


  • Jing Great for screen shots, video recording and has an extremely useful online sharing feature.
  • Snapz Pro X is very popular and can even record movies. It has a large range of features, $69 with free 30 day trial
  • SnapNDrag is also popular and offers several features in addition to those offered by the default screen capture tools. With SnapNDrag, users take a screenshot, then drag it to their destination. SnapNDrag is freeware, but also has a pro version.


Monday, April 1, 2013

Virus Protection on Windows 8


This is NOT an April Fool's Post!! Have a great day!

Windows 8 comes with Virus Protection built in. You do NOT have to purchase McAfee, Norton or download AVG like I wrote about in an earlier post. 

Here is what you can do to see what is already set up.


    1. Go to the Charms Menu (the bar to the far right of your screen that appears when you put your mouse in the top corner)
    2. Click on SEARCH.  There is a picture of a magnifying glass to represent it.
    3. Click on Apps if it is not already chosen and type in “windows defender”.
    4. A window will come up showing you how Windows Defender is set up.


It is set up to automatically do real time protection and to keep up with new virus and spyware definitions.  You can do a scan manually by clicking on Scan Now. A full scan took me less than an hour while I did other things on the Surface. My copy of Windows 8 was set to do quick scans and it had just done one when I was working on it and I didn’t even notice. 

There are four tabs on the window that appears:

Home-This tab is the one that always appears when you set up the program and is described above.


Update-This tab shows you when the virus and spyware definitions were last updated. There are new viruses and spyware everyday, so it is set to automatically update, but you can click the button and manually update if you want.


History-Virus protection programs quarantine items that might be harmful. You can see a list of these items or a list of the ones that were scanned and allowed or both by clicking on the View Details button in the middle on the bottom of the window


Settings-If you know of certain files that you never want scanned you can designate them from the scan here. There is probably no reason to do this since the scan is done in the background and doesn’t take too long, but if you want it to go faster for some reason you can designate that certain things are not scanned. You can also set how long the computer keeps quarantined files (that were identified as having viruses) 

SHARING VIRUS INFORMATION

Microsoft collects the virus information from your computer to help protect everyone who uses the Microsoft Security program. You can opt out of this or allow them to collect more information by going to Settings and choosing MAPS (Microsoft Active Protection Service). The default is set to Basic membership. 

THE SEARCH FUNCTION

Something I learned when trying to find apps and while writing this is that SEARCH on the Charms Panel is really powerful. If there is anything that you used to do with your computer and need to find out how to do it with Windows 8 you can just type the item into the search window and then choose Apps, Settings or Files and you will be given a list of the items it finds.  I used it to find Windows Defender and Control Panel.