LET'S MEET ONLINE

LET'S MEET ONLINE! Call (512)560-2609 or email helpimnotageek@gmail.com and set up a time for a session. It works really well. We talk on the phone while I see your screen.
Showing posts with label sync. Show all posts

Monday, September 30, 2013

OK I'm ready for an iCalendar, now what?

There are so many different types of calendars and devices to talk about and I am not an expert in all of them, so this time I will tell you a story about how I solved my calendar problems and then give you a few tips about how to export a calendar from one type of online calendar and import it into another.
If this does not answer your questions maybe the links below will help you. You can always go to Google and just type in your question. Most often a lot of links will show up with discussions from people who have had the same problem as you have and often there is a solution you can use.

Using the Calendar in iPhone
I started by using my iPhone Calendar regularly. All of my appointments were on my iPhone. Here is what I do.
1. Click on the Calendar icon on my Phone.

2. Find the date that I am wanting to put something onto. This has changed with OS 7.  Here are some screen shots of how I go through it.
  • Click on Today in the bottom corner to get back to today's date. 
  • Click on the name of the month at the top of the page and scroll down to find the month that I want.
  • Click on the calendar of the month that you are wanting.
  • Click to choose a date that you want to put something on.


  • Click on the + at the top right side to add an event. 
  • Fill out the event information (remember that there is more you can put in if you scroll down)
  • Click on DONE on the top right when you are done.
The Event Details will appear. It will show what you have put in as well as which calendar it is on.

To Delete an event click on it and when the Event Details appear click EDIT on the top right side and scroll down until you see the red delete button. Click it and the event is gone.

Syncing that Calendar with the Google Calendar
Now that I had the events on my iPhone I wanted to be able to see them on my Google Calendar. I can get to a Google Calendar where ever I am, even without having my own computer. There were two things that I needed to do in order to make my events show up on Google Calendar.

1.  I followed the directions on this link: https://support.google.com/calendar/answer/151674 which made sure that my Calendar was set up correctly. I named the calendar that I wanted to sync "Google Calendar" and gave it a different color than other calendars so that I could see what was happening.

2.  I went back to the calendar on my iPhone and went to the appointments that I wanted to show up on the Google Calendar. I clicked on the event and on the event details looked to the part that told me which calendar it was on. Most of mine defaulted to HOME and had blue dots, so I clicked on the word HOME and switched it to Google Calendar.  When I changed the Calendar they began to show up on my Google Calendar on the computer.


Sharing Calendars with Other People
I thought it would be good to have my husband's events on my calendar so that I could keep up with what he was doing. In order to do that in Google

  • On the computer open up and sign into your Google Calendar
  • Click on the Gear on the top right side and slide down to the word SETTINGS
  • Click on the tab at the top that says CALENDAR
  • Click on the link under Sharing.


  • Look for Share With Specific People.
  • In that box type the names of the person you want to share your calendar with. 
  • You can share your calendar with more than one person.

  • They can opt to have your calendar show in a different color on their calendar or not to show. 
Finally, How to Export and Import your Calendar
This may help you if you want your events to go into a calendar that is not compatible with the Google calendar or another calendar that you have. Instead of using SAVE like you do with a document you choose EXPORT. 

EXPORT is usually found under the File Menu, but in Google Calendar it is in the settings.

This exports the file into a format that can be opened by most calendars. One of the formats that is used is .CSV It cannot be clicked on and opened up as a calendar (it may open, but will look like a mess or not open at all. What you need to do is to IMPORT it into another calendar program.

Open the other program and under file look for the word IMPORT. When you choose IMPORT a window opens like when you want to open a file. Find the file that you just EXPORTED and choose it. The calendar program will open it up and you should have all of your calendar items on the new calendar. 

This can also be done with your CONTACTS or ADDRESS BOOK. With most programs you can EXPORT your contacts and then IMPORT them into another address book program. 

IMPORTANT NOTE - This is not the same as syncing your calendar or address book. You are only moving over the things that were entered in the past. It will not continue to update as you update the old one. 

OTHER RESOURCES

Google Support
https://support.google.com/calendar/answer/151674?hl=en

https://support.google.com/mail/answer/3008051

About.com
http://email.about.com/od/googlecalendartips/qt/Sync_Google_Calendar_and_iPhone_Calendar.htm

Digital Trends
http://www.digitaltrends.com/mobile/sync-multiple-google-calendars-on-iphone-or-ipad/

Friday, June 29, 2012

Getting iCloud to Work on all of your MAC Devices

If you have more than one Mac Device (an iPhone or an iPad) you may be interested in keeping them all the same. Now you can do that without syncing. Syncing is connecting your device to your computer's iTunes with the cord that came with the device. Now you never need to connect your device to your computer. Everything that happens on one device is also recorded on all of the other devices.

One of the best things about this is that if you download a new app from the app store it is automatically downloaded onto all of your devices. Another helpful thing is that when you change your address book, or calendar on one device it is changed on all of your devices.

The thing you need to know is that all of this can be controlled and must be set up at the beginning. Each device has a System set up area that includes iCloud.

Here is how to get to each one:

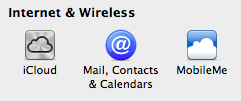
On your MAC computer click on the black apple in the top left corner. In the list that appears choose System Preferences and then look for the iCloud icon. If you do not have an iCloud icon you need to upgrade your operating system.
When you find the iCloud icon you can click on it to set up what you want to automatically sync. You then need to do the same set up on all of the devices that you want to communicate with.


On an iPhone or iPad look for the Gear Icon that says Settings down below the icon. It will lead you to the area where you can set up your iCloud. In this way you can set up your iPhone in a different way than your iPad if you wish.

You cannot stream your photos through iCloud unless you have iPhoto 9.2 or later. So far I have not upgraded to a new version of iPhoto, so I still have to transfer my photos the old way. 


So, now you know two ways to sync your device to your computer; through the cloud or using your computer's iTunes and plugging in physically with the cord that came with it. Remember that the Cloud is actually a computer. In this case it would be one of Apple's huge servers. So all of the data that you sync to your devices is also saved on their server. Just be thoughtful about what you want on a public computer. If you have passwords or banking information you may not want to put it on the Cloud. You can choose to sync with the cloud for part of your data and to sync onto your computer for other things. You are able to set it up in whatever way works for you.


Wednesday, October 19, 2011

Updating your iPhone to IOS5

Today when I went to sync my iPhone it told me that I needed to update to IOS5. There are a lot of changes in this version, so I though I had better do it.  I said yes and it began doing whatever it does when it updates and syncs. I continued working on the computer to get some things done that I needed to do. When I looked back at my phone it looked like it had synced, but when I went to iTunes on the computer it said,"An error occurred while backing up this iPhone (-5000). I went back to check my phone.  It looked OK, but when I tried to open on of my games nothing happened (a black screen).

It is such a horrible feeling when this happens. But I kept having to remind myself that everything was still on my computer because I have been syncing often. Even if it was not on my computer right now I have been doing regular back ups of my computer, so I could restore the data from a back up in the past. (REMINDER-Have you been backing up what you have on your computer to an external hard drive?)  It is hard not to feel panicked though!

When a sync goes wrong you can always choose RESTORE to restore your iPhone to the state when you got it. This will empty everything off of your phone, but remember it is still all on your computer. I clicked on Restore once and it seemed to get stuck again. So, I looked online. I have learned that you can find help for almost anything by typing it into a Google Search. I typed "problems with iphone update 5" into the search box and found this link http://www.zdnet.com/blog/storage/beware-the-ios-5-update/1553 The article described the same thing that had happened to me. That made me feel a little better. Reading it gave me the courage to try RESTORE again. This time it worked like it was supposed to. After the iPhone is restored I then chose to SYNC so that it put my calendar, contacts, and especially my apps back onto the iPhone. It is now all working again.

Wednesday, August 3, 2011

Apps, Memory, and Deleting Permanently

It is confusing to figure out what apps are actually on your device and how much memory they use. If something uses too much memory and you don't want it how can you be sure it is deleted?

The iPhone and the iPad are made to be used with iTunes on a computer. It does not have to be a Mac. You can download iTunes for free on a PC also from http://www.apple.com/itunes/download/. When you open iTunes it automatically senses which device is plugged in and gives you different information for each one. When I have my phone plugged in on the left side I see it listed.


I can click on it and then see lots of information about the device. It also automatically begins downloading whatever I have set up in the preferences (the tabs at the top of the page). One thing it shows me is how much memory I am using. It is in a really nice bar at the bottom of the screen.

You can tell how much Audio, Video, iPhotos, Apps, Books and others are on the device and how much space is left in the memory.

This works the same for the iPad and iTunes.
When you are in iTunes and you click on the word SYNC to sync your device to the computer it can sync differently depending on which device is plugged in. You set up your preferences on each one. One advantage of syncing is that it transfers anything that you have downloaded directly to the device to your computer so if something happens to the device it is easy to reload it.

To delete an app on the device itself hold down the icon for that app until you get the minus sign and then delete it from the device. This will remove it from the device, but it is still in your iTunes library. When you sync again it will be BACK on your machine. In order to delete something permanently so that it does not take up any space or return you have to delete it in iTunes. In the same way if something is on your device and you have deleted it from the computer you are syncing to you will get a chance to put it on the computer.

To do this:
1. Plug in your device
2. Open iTunes if it does not open automatically
3. Go to the menu where you want to delete something (Podcast, Movie, Music, Apps) and find the one you want to delete and select it by clicking once on it.
4. Press delete on your keyboard. You will see this window. Click Remove to confirm.

Now when you sync your device the item will be permanently removed and it will not be taking up any memory.