LET'S MEET ONLINE

LET'S MEET ONLINE! Call (512)560-2609 or email helpimnotageek@gmail.com and set up a time for a session. It works really well. We talk on the phone while I see your screen.
Showing posts with label iphoto. Show all posts

Monday, October 5, 2015

HELP - Dealing with Photos!

I know that I have written on this before, but it just seems to keep changing and being difficult. Apple updated its system for dealing with Pictures from iPhoto to Photos and it has taken me quite a while to figure out what to recommend to people.

First of all, I think it is always good to follow directions to update a program whenever you get that message. It will keep your computer running faster and keep you up to date. One of my clients had an iPhone with the new Photos program and still had iPhoto on her iMac because she had not updated to Yosemite. That was confusing. It is a bit clearer when you are dealing with the same program both places.


We, older people, have an outdated way of thinking about photos. Computers and digital photo taking has totally changed how it all works. It used to be that you had film with your originals and paper copies of your photos. You could hold them in your hand. You could lose them or they could get mouldy in the basement. You could put them into albums or boxes. You could pass them on to your children.

Now, they seem sort of ephemeral. Where are they really? How can I organize them and keep from losing them? It is so easy now to take pictures that we all have SO many of everything and often there are multiples or pictures that we don't want to keep, but who has time to go through them all?

SOME ADVICE

Use the 3, 2, 1 principle of saving pictures and videos that you really want to keep. Have 3 copies saved in two places and put one in a safe deposit box or offsite somewhere that you can access and update once a year, or on some regular basis.


Three copies of any picture that you really do not want to lose should be saved. One is your primary and two are back ups. 

Two copies should be on different media. Do you remember floppy disks?  Most computers today do not have floppy disk drives, so you cannot access them any more. The CD drive is going the way of the floppy drive, so it is possible that if all of your copies are saved ONLY on CD you may not be able to access them easily later. So, you could have one copy saved on a hard drive and one on a CD. Or you could save one on your computer and one in the cloud. I think I might keep one on my computer, but have two external drive backups. One of them would be my regular back up that I keep at home and one ONLY has photos and is kept in a safe deposit box at the bank or something.


One is kept offsite somewhere. If there is a disaster at your house and you lose your computer and your backup at least you will have a copy of everything that you last backed up in another location.


http://www.dpbestflow.org/backup/backup-overview#321 tells more about this and explains it as a way that ALL important files should be backed up. DP stands for Digital Photograpy and this comes from the American Society of Media Photographers, so it may be overkill for us home picture takers, but it is helpful information.

MAC
Like I said above you should always keep all of your devices up to date so that they are using the same software, especially if you want to sync between devices.

The new software called Photos does something interesting. It will hold up to 1000 photos and as you add new photos after that it drops off the oldest ones and only keeps the newest. When a photo is deleted from your phone it is deleted from all devices that are syncing to it. You can turn on iCloud storage if you want to keep photos. This will give you 5G of storage space for free. If you want more you can pay for it

What if you want to store your images forever (or as long as possible)? On the Mac help page it says:


iCloud Photo Library stores all of your original photos and videos in iCloud, but we always recommend you keep back up copies of your Library. You can download your photos and videos from iCloud to your computer and store them as a separate library, transfer them to your computer with iTunes, or store them on a separate drive.
You can go to http://icloud.com to see what photos are stored there. If you want to do something with those photos you can click on them. Once a picture is open you can share, delete or download it. If you want to do this to multiple pictures choose the word SELECT at the top right of the screen and you will be able to put a checkmark in the ones that you want to act on. 

If you don't want to spend more money on photo storage there are lots of options. You can download them to your computer and save them in the Pictures file. One thing lacking in the Pictures file is automatic organization. You have to put pictures in folders and organize them yourself. You can then save them to an external hard drive, or two. You can upload them to an online storage space. Amazon Prime offers unlimited storage space for free and so do many other places. See information on Picasa and Flickr below.

PC
There are many programs that store photos. The one that comes with your PC is called Windows Photo Gallery. Photo Gallery can find all of the pictures in your Pictures file and automatically store them in folders by date. You can then go in and do all sorts of things with your pictures. You can reorganize them into different files, edit them, give them tags or keywords so that they are easy to find.

There are other programs online and that can be downloaded to your computer that do similar things. Picasa is owned by Google and now works with Google Photos. It has an online feature and you can download a program for your computer that will sync with it. It gives you the ability to organize and edit your photos. Shutterfly, SmugMug, Flickr (which is owned by Yahoo and requires a Yahoo login).

Helpful article on Photo Storage
http://www.theverge.com/2015/4/29/8467289/cloud-photo-storage-comparison-dropbox-icloud-flickr-onedrive-free

So, what am I going to do?......  Someday when I have lots of time I am going to organize all my photos. I think I will get two hard drives. On both of them I will upload ALL of my photos. On my computer and my phone (and iPad) I will have the same set of the most current photos in the photo program so that I can look at them and easily use them. Then once a year... September?, January?, my birthday? I am going to get the second hard drive from the safe deposit box (or where ever I decide to save it) and update BOTH hard drives and keep just the current year on my computer, phone, and iPad. Someday..... but then I still have VCR tapes waiting to be converted and cassette tapes that need conversion. 

Monday, August 19, 2013

I want certain photos in my iPhone Gallery!

The photo gallery of your iPhone SHOULD be the place where you have photos that you can share on the run. It should be used as the new grandma's book of pictures of her grandchild or pictures of the wedding that you want to be able to show anywhere at any time! What about that cruise in Alaska or vacation in Hawaii that you just took?

The thing about the iPhone to remember is that you use iTunes for EVERY change that you want to make on your phone. There is a way to create a folder right on the phone and move pictures into it that I will describe later in this post, but most of the time you will go to iTunes.

PUTTING AN ORGANIZED PHOTO ALBUM ON YOUR PHONE

Step 1 Open up iPhoto

Step 2 In iPhoto choose FILE>NEW ALBUM


Step 3 Name the album and drag pictures into it from the tray of thumbnails. You can open one event and drag over multiple shots, open the last 12 months and drag in assorted photos, or choose any view you want in order to see the photos you want and drag them over. You can close iPhoto if you want.
Step 4 Plug in your phone and open iTunes.

Step 5 Click on your phone on the left side of the screen and choose "Photos" from the top of the screen.


Step 6 This is where you indicate which folders you want to be transferred over to your phone. At the top choose to add all folders or only the ones you indicate. Put checkmarks next to the folders to move to the phone. 

Step 7 Click Apply on the left bottom of the screen and then Sync. The folder will be added to your phone. When you want to take it off you can just take the checkmark out of the box and sync again!


FOLDERS THAT ARE ALWAYS THERE

You may have noticed that there are always 2 folders in your iPhone Gallery; library and camera roll. You cannot delete them and they seem to have different photos. Why?

Camera Roll - This is a folder that contains all of the photos that you have taken using your phone. When you download your photos to iPhoto a question comes up at the end of the process asking if you now want to delete your photos from the phone. One way to organize your photos is to always delete the ones in the camera roll from the phone and to add organized folders that you want to show people by creating an album in iPhoto and putting it on the phone (see above). It does not hurt to leave the photos on the phone, but they do take up some of the memory.

Library - In the library are copies, not originals, of all of the photos that you have put onto your phone using iTunes. They do not take up any memory space. When you click on them it goes to the same photo that is listed in your Album. This is the only place you will see the Events that you have loaded onto your phone. Plug in your phone and go to iTunes.Choose Photos from the top of the page. It will open up to a window where you can indicate which Albums and which Events you want to put onto your phone. Albums each show up in a list below the Camera Roll and Library. Events show up in the Library. 


CREATING FOLDERS AND MOVING PHOTOS ON THE PHONE

If  you want to create a new album right on the phone from photos in the folders already on your phone follow these steps:

1. On your phone go to Photos.

2. Click the + sign at the top left of the screen.

3. Type in a name for the folder.


4. A new folder is created and a screen comes up asking which photos you want moved into the new folder.


5. Click on the photos for the new folder and click Done.

6. The new album appears at the bottom of your list of Albums containing the photos that you have moved.


You can always add or remove from the albums you create by choosing Edit on the top right of the page of photos (the album is open).  To Add click the word add which will take you back to your list of albums. Then find and check the photos you want to move. They will be added to your new Album when you click Done. In the Camera Roll you can delete photos unless they are photos that you have moved to an Album. The album just points back to the original photos and so if you delete them you will also delete the photos in the album. All album have the option to share the images to Facebook, email and many other places if you click Edit. 

Tuesday, March 12, 2013

Solving Problems and iPhoto Faces

Sometimes this blog is personal. That is, I write about a problem that I have been having and how I resolved it (or didn't). This is one of those posts,


The other day I was meeting with a Mac Club and one of the members wanted to organize her pictures. I told her that since she had a Mac she might find that iPhoto was the best way to do it. We went into iPhoto and started looking around. I showed her how my pictures were organized into events and how to tag pictures and give them titles. Then someone else said that you should use FACES as a way to organize your pictures. Well, I have never used Faces. It seemed like it would just take too long and not be all that helpful. I am still not sure what I think about it, but I found out that my copy of FACES was not working like it was supposed to.


When you open iPhoto and click on Faces you get the message saying that to get started open a photo, then click Name and then type the name of the person in the photo. Well, after I had found Name icon (in the bottom left side) I typed in the name and the corkboard did not change. It should have put that person's picture on the corkboard and found all of the pictures that matched that person. My corkboard still had the picture above on it.

I tried this several times with no results.  So I decided to do what I usually do to try to figure something out. I Googled it. I used the words "iPhoto faces no change in corkboard".  There were lots of results, so I knew that this was a problem for more people than just me. Some of the results said iPhoto 11, so I had to confirm my version of iPhoto first. When I clicked on the iPhoto menu and then clicked "About iPhoto" I found out that I had version 9.0. Since there were still problems with iPhoto 11 I knew that upgrading would not solve my problem.

In one of the discussions that I scanned through there was a comment from someone 

1. "While holding down the Control key (bottom left on keyboard-says "control"
2.  we clicked the iPhoto library that was in my pictures folder 

3. and selected the "Show Package Contents" menu option. 


Then we threw out (click on the file name and drag it to the trash-usually at the bottom right of the dock) the face_blob.db and face.db and restarted the computer - 


(my note) The files are automatically recreated when you restart your computer, so don't worry about losing them.

Now iPhoto works fine - the Faces thing ran showing some sort spinning clock icon as it found all the potential faces in all my photos - "


I tried this and it solved my problem! It took a long time to scan through all of my photos. Now when I click on NAME and Name someone it goes through all of the my photos and tries to find matches. I have to confirm or deny that they are the person that I typed and then their face shows up on the corkboard! 


Friday, June 29, 2012

Getting iCloud to Work on all of your MAC Devices

If you have more than one Mac Device (an iPhone or an iPad) you may be interested in keeping them all the same. Now you can do that without syncing. Syncing is connecting your device to your computer's iTunes with the cord that came with the device. Now you never need to connect your device to your computer. Everything that happens on one device is also recorded on all of the other devices.

One of the best things about this is that if you download a new app from the app store it is automatically downloaded onto all of your devices. Another helpful thing is that when you change your address book, or calendar on one device it is changed on all of your devices.

The thing you need to know is that all of this can be controlled and must be set up at the beginning. Each device has a System set up area that includes iCloud.

Here is how to get to each one:

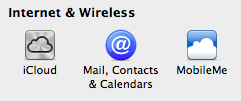
On your MAC computer click on the black apple in the top left corner. In the list that appears choose System Preferences and then look for the iCloud icon. If you do not have an iCloud icon you need to upgrade your operating system.
When you find the iCloud icon you can click on it to set up what you want to automatically sync. You then need to do the same set up on all of the devices that you want to communicate with.


On an iPhone or iPad look for the Gear Icon that says Settings down below the icon. It will lead you to the area where you can set up your iCloud. In this way you can set up your iPhone in a different way than your iPad if you wish.

You cannot stream your photos through iCloud unless you have iPhoto 9.2 or later. So far I have not upgraded to a new version of iPhoto, so I still have to transfer my photos the old way. 


So, now you know two ways to sync your device to your computer; through the cloud or using your computer's iTunes and plugging in physically with the cord that came with it. Remember that the Cloud is actually a computer. In this case it would be one of Apple's huge servers. So all of the data that you sync to your devices is also saved on their server. Just be thoughtful about what you want on a public computer. If you have passwords or banking information you may not want to put it on the Cloud. You can choose to sync with the cloud for part of your data and to sync onto your computer for other things. You are able to set it up in whatever way works for you.