Occasionally I have worked with people who have Pages both on their Mac and on their iPad. It only costs $9.99 to put Pages onto your iPad. I had version 8 when I started and was not able to transfer documents. You must upgrade to version 9 in order to transfer documents. When I did that it automatically upgraded the copy of Pages on my Mac. I didn't know it would do that, but it did!
The process for adding pages from your computer to your iPad follows:
Here are the instructions about moving the files from Pages on the iPad to iTunes and finally saving them on your machine:

 To put new folders on your iPad in Pages:
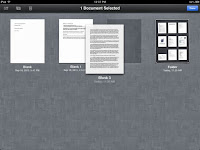
First hold your finger on a document you want in a folder until it wiggles. Then drag this document on top of another one that you would like to have in a folder. A window will open up with Folder 1 as a name. You can type to replace the name with a new name.

- Go to iTunes on your computer.
- Plug in your iPad.
- Select your iPad in iTunes and select the apps section at the top.
- Slide down the page until you see Pages under File Sharing and click on it.

- Click on Add at the bottom of the page.

- Find the document by following the path on your computer.
- When you click on it you will see it added to your list in the iTunes Pages list.
- Now go to Pages on your iPad.
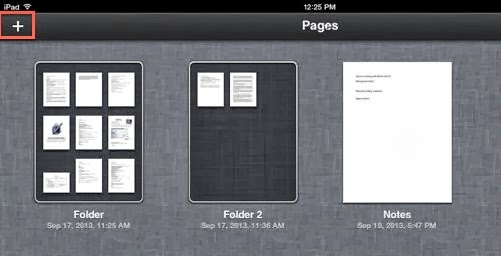
- Click on the + sign.

- Choose “copy from iTunes”
- When you see the document that you want to import to your iPad click on it and it will be added to your iPad. You must have iWork 09 on your computer or this will not work, even if you have iWork 09 on your iPad.


Here are the instructions about moving the files from Pages on the iPad to iTunes and finally saving them on your machine:
- Open up Pages on your iPad Select the document you want to move and open it.
- When the document is open click the wrench on the top right corner.

- A window will open. Choose “Share and Print”
- That will open a new list. Choose “Copy to iTunes”
- Now plug your iPad into your computer and choose which format you would like to transfer (pages, doc or pdf)
- When you choose the file will automatically be transferred to your computer. In order to see it you have to open iTunes.
- Click on the Apps category at the top and slide down the whole page until you see Pages.
- Click on Pages and a list of the documents that you have transferred will appear.
- Choose the document that you are interested in having on your computer and click “save to” at the bottom.

- A window just like most save windows will open and show your folders on the computer. Choose the one you want to save it to and click Save to.
- Now you will be able to open it up on your computer.

This is a lot of work to go through if you have lots of documents to transfer. You may want to consider using the cloud in order to keep your file system and import all of the files at once. Here are steps to do that:
- To Set up iCloud go to Settings on your iPad.
- Click on iCloud on the far left list.
- Sign in with your account.
- Use the sliders next to each of the apps to show what you would like to sync.
- Make sure that Documents and Data is turned on.
- Scroll down to Apps on the left side of the settings window and tap Pages
- Slide “use iCloud” to ON.


 To put new folders on your iPad in Pages:
 First hold your finger on a document you want in a folder until it wiggles. Then drag this document on top of another one that you would like to have in a folder. A window will open up with Folder 1 as a name. You can type to replace the name with a new name.

I learned most of this from:
No comments:
Post a Comment